How to Prepare for a montreal In-Home Photoshoot: Practical Steps for Authentic Family Photos
Getting your home ready for an in-home photoshoot can feel like one more thing on a busy to-do list, especially with kids, schedules and everyday clutter. This guide walks you through simple, focused steps to make your rooms feel calm and camera-ready. So the real moments, connections and giggles, take centre stage. You’ll find a quick declutter routine, easy lighting fixes to capture warm natural tones, room-by-room styling ideas for bedrooms, living rooms and nurseries, outfit guidance, and a compact day-of checklist for family lifestyle sessions. Each section gives clear, timed actions, five- to thirty-minute tidy passes, window-based lighting tips, and child-friendly prep, so you can feel prepared and relaxed on the day.

By the end you’ll have a straightforward plan to ready your home for a Montreal in-home session with as little stress and as much authenticity as possible.
Essential Steps to Declutter Your Home for an In-Home Photoshoot
Decluttering for photos means removing visual distractions, not deep-cleaning. Focus on high-impact spots to ensure cleaner frames and keep attention on faces and interaction. Fewer competing shapes and colors allow the camera to capture emotion more easily, reducing editing time. Start with quick wins (10–20 minutes), then address medium-priority areas if time allows.
Here are fast, step-by-step actions to clear clutter, plus a reminder for the morning of your shoot:
Clear counters and tabletops for simple backgrounds. A single small grouping or a blank surface works best.
Stow toys and charging cables in a basket or drawer to remove bright, attention-grabbing elements.
Tuck away remotes, charging stations, big digital clocks and anything that create busy patterns.
These priorities keep the focus on what matters most and lead into room-specific suggestions.
Which Areas Should You Focus on When Decluttering for Family Photos?
High-impact zones include the living room, kitchen counters, bedside tables, and play areas, places where candid moments happen and wide shots reveal background details. Clearing these spots improves sightlines and keeps focus on your family, especially if the space is on the smaller side. Strategic editing means removing the loudest items first, then refining textures and colours to make your family the natural focal point. Super important is to take the excess out but keep your home YOURS. Authentic, lived-in and with personality.
Use the room-by-room table below as a compact checklist to prioritize actions before your photographer arrives.

This quick plan makes it easy to assign tasks and finish prep fast, allowing you to focus on light and wardrobe.
What Items Should Be Removed or Hidden to Reduce Visual Distractions?
Items like charging cables, remotes, small appliances, bright toys, and busy artwork tend to pull focus. Grouping or hiding them creates calmer frames and stronger compositions. Since the eye seeks contrast and pattern, colourful or shiny objects can steal attention from faces. Fast storage fixes, baskets for toys, drawers for electronics, neutral boxes for small items, let you declutter quickly. Replace overly bold décor with one or two meaningful props that add emotional value, unless you really want to highlight them in your photos.
After clearing distractions and add cozy elements so your home complements your family.
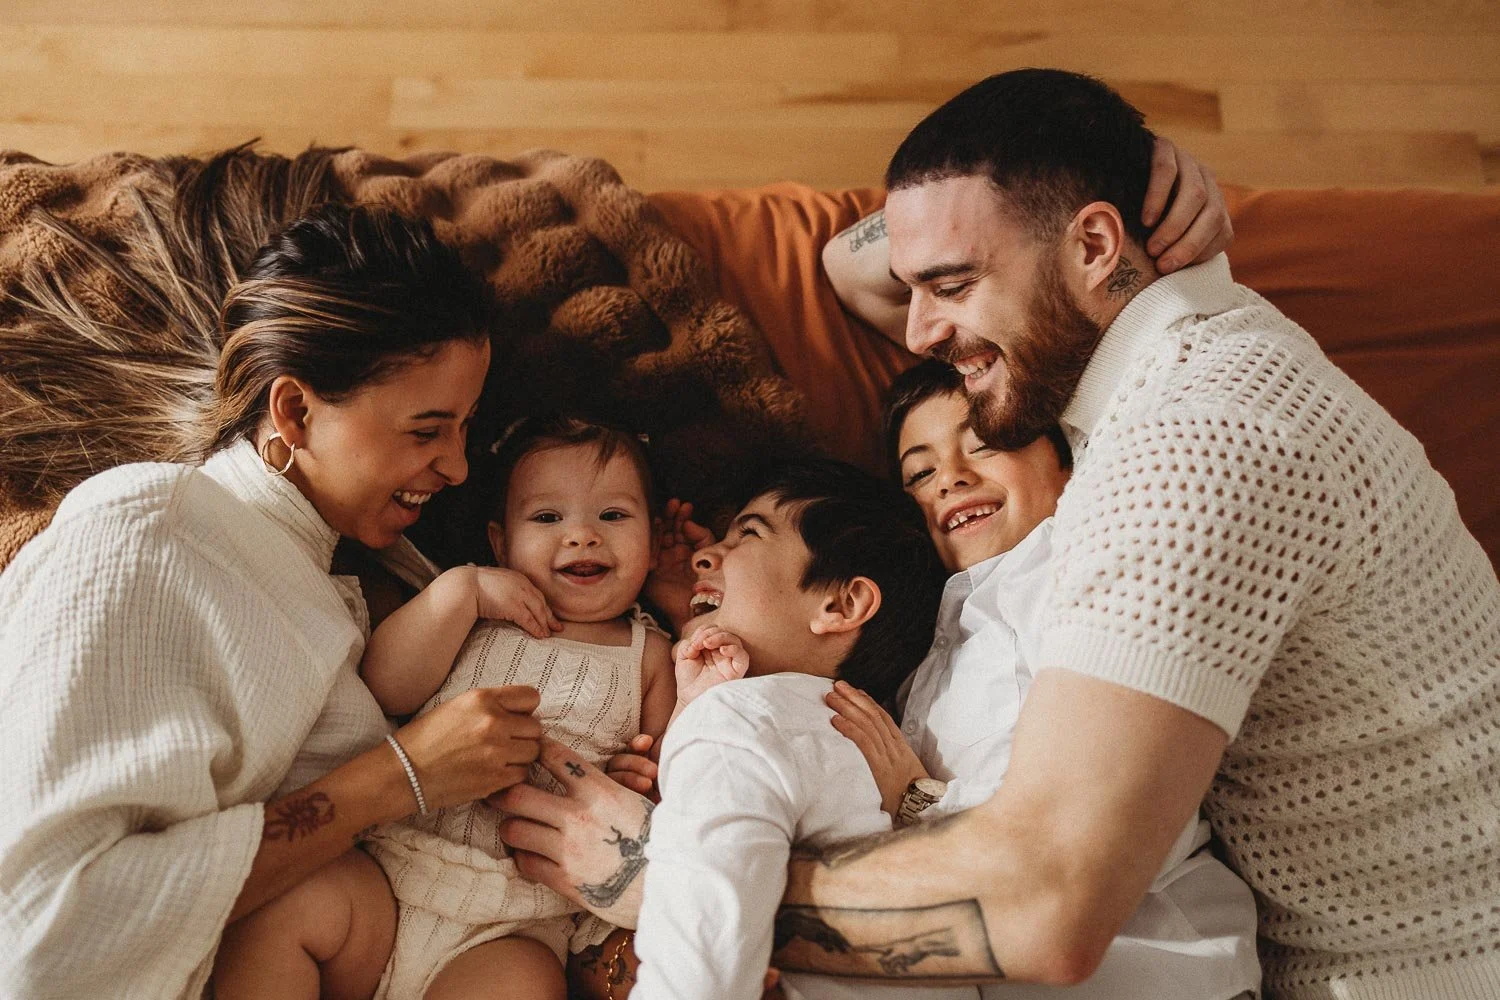
Wardrobe Tips for Your In-Home Family Photoshoot
Good wardrobe choices involve complementary colors, comfortable fabrics, and avoiding high-contrast patterns to keep faces in focus. Coordinated, rather than perfectly matching, outfits feel authentic and timeless. Similar tonal families and textures create visual cohesion. Start with 2–3 complementary colors and layer textures for depth without clutter.
Here are practical dos and don’ts for camera-friendly outfits:
Do pick 2–3 complementary colors: A neutral base with one or two soft accents ties everyone together.
Do choose soft textures and layers: Sweaters, linen, and knit fabrics photograph well and keep people comfortable.
Don’t use bold logos or tiny stripes: They distract and can cause a weird effect on camera.
Below is a quick outfit reference by family role to balance comfort and photographic impact.

This guide helps you choose outfits that balance style and ease for active, candid photos. I want everyone to focus on the connection rather than the tight pants. Remember: comfort over perfection.
How to Choose Comfortable and Coordinated Outfits for Your Family?
Pick clothes that allow movement and comfort, as comfortable clothing leads to natural and relaxed interactions. Stiff fabrics can cause tense expressions; soft layers and breathable materials encourage play and laughter. Practical choices like easy diaper changes, removing shoes for living-room shots, and a lightweight wrap for mom make transitions smoother. Consider palettes like warm neutrals with soft blue, soft grey with blush, or earthy tones with cream highlights. Super important: please, please, please, don’t blend in with your home. Look at your walls, furniture and decor and try choosing outfits that complement or stand out. Your family is the star of the show and not another decor!
What Clothing Patterns and Accessories Should You Avoid?
Avoid tiny stripes, large logos, neon colours and highly reflective jewelry, as they create visual noise or distracting glare. High-frequency patterns and shiny surfaces can dominate the frame. Instead, choose subtle textures (knit, linen, soft cotton) and simple accessories like a small pendant or textured scarf. For babies, skip noisy fasteners and opt for soft, breathable fabrics.
These swaps keep the visual emphasis on connection and movement, helping your family relax into the session. If you need a more broken down guide on how to choose your family’s outfits, you can read a blog I prepared specifically for this.

Creating a Cozy and Personalized Atmosphere for Your In-Home Photoshoot
Make your space personal by adding one or two meaningful props and soft textures that reflect your family story without cluttering the shot. Thoughtful props invite natural interactions, like reading a favourite book or wrapping in an heirloom blanket. The key is restraint: limit props to one or two per scene and weave them into play or cuddle moments for candid, comfortable images.
Below are simple guidelines for choosing props that enhance rather than overwhelm your photos.
Pick one meaningful item per scene: an heirloom blanket, a loved book, or a handmade toy.
Layer textiles (throws, rugs, pillows) in neutral tones to add depth without clashing with clothing.
Avoid novelty or oversized themed props that can date images or distract from interaction.
These choices tie directly into safety and styling considerations.
Which Personal Props and Meaningful Items Enhance Your Photos?
High-impact props include an heirloom blanket, a worn storybook, a baby bonnet, or a simple wooden toy. Objects that hold meaning and prompt natural behaviour like reading, cuddling, or gentle play. Meaningful props offer context and invite interaction rather than posed actions, increasing authenticity. Use them during real activities (read a page, pass a toy, wrap the baby briefly) to keep movement candid. For newborns, avoid small detachable parts and choose breathable fabrics for safety.
Thoughtful prop use supports narrative-driven images and pairs well with small background swaps for a cleaner look.
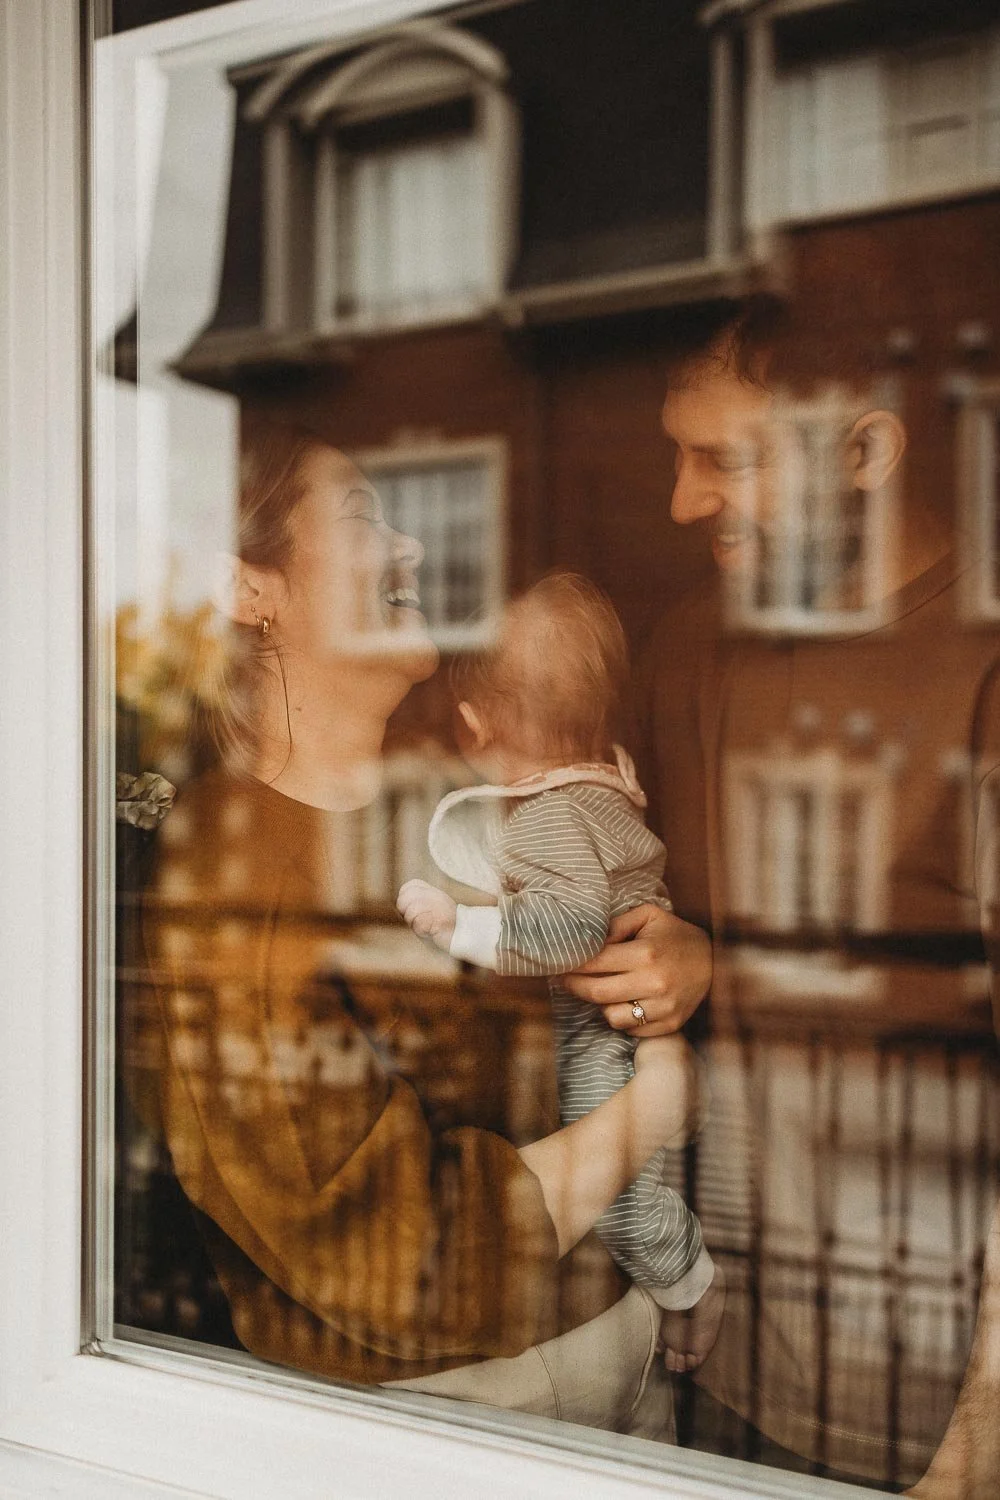
How Can Neutral Colours and Textures Improve Your Home’s Photo Backdrop?
Neutral tones and tactile textures (wool throws, linen pillows, flat-weave rugs) reduce visual competition while adding subtle depth that flatters portraits. Neutrals allow skin tones and expressions to be the main colour cues, while texture prevents flat-looking images. Quick swaps, replacing a bold pillow with a cream throw or a bright rug with a neutral runner, instantly improve cohesion. Aim for a few complementary textures rather than many patterns to maintain visual interest without distraction.
These styling choices work with your wardrobe and give me cleaner frames for natural, emotive images.


Specific Preparation for Different In-Home Photoshoot Types
Each session type requires a focused approach: newborn shoots prioritize temperature and safe props, maternity sessions emphasize comfort and flattering silhouettes, and family sessions center on timing and sibling readiness. Separate checklists ensure safety and interaction priorities are met, resulting in smoother, safer shoots tailored to your family and the photographer’s workflow. Below are concise, prioritized checklists for the day before and day of your session.
These mini-checklists cover essentials, allowing you to finalize plans and approach the session with confidence.
How to Prepare Your Home for a Newborn Photography Session?
For newborn shoots, control room temperature, plan feeding and soothing logistics, and choose safe props for baby’s comfort. Keep the room warm, have feeding supplies and burp cloths ready, and clear a stable surface for wraps and blankets. Avoid small, loose props; use large, breathable blankets and familiar items for safe composition. If you need help with baby’s outfit, please let me know. I also have a small wardrobe collection of baby hats and a few knitted outfits you can borrow.
Key Tips for Maternity and Family In-Home Sessions
Maternity sessions focus on comfort and flattering lines: choose gowns or flowing tops that highlight the bump without constricting, you can check my in depth guide to prep for your maternity photoshoot. For family sessions, schedule when the kids are rested and fed. Keep quick-change options nearby for toddlers and a lightweight wrap for mom to layer. These preparations lead to a wider range of images, from intimate maternity portraits to lively family interactions, captured with minimal stress.
My approach is designed to keep sessions relaxed and authentic. Booking a consultation call and reading my preparation blogs will provide a compact plan tailored to your home and family.
Frequently Asked Questions
-
If your home feels small, focus on decluttering and maximizing natural light to create a sense of spaciousness. Use mirrors to bounce light and add depth, and choose the brightest corner for your family. I will position you near windows to enhance the natural ambiance. I’ll also use a wide-angle lens thoughtfully to include more of the space without distorting faces.
-
The best time often coincides with soft natural light, typically early morning or late afternoon (golden hour), but depends on your home’s layout and window direction. If a room gets great morning light, plan then; if living spaces warm up later, aim for afternoon. Although my in-home sessions are almost always in the morning, let me know if you have amazing light during the afternoon and we can discuss about it.
-
100%. Get the kids involved by letting them help pick outfits from a coordinated selection and by talking about fun activities you might do during the shoot. Practice simple games or poses at home to make the day feel familiar. When children feel included and prepared, they’re more relaxed and more likely to show genuine expressions during the session. Please don’t stress if the kids don’t “behave”, I also have kids and I know that it takes time for them to warm up to a stranger. The best photos are the ones were no one faked a pose or a smile.
-
To look natural, focus on candid interaction rather than rigid posing. Encourage play, tell a joke, kiss and tickle your kids, or read a short story to spark real reactions. Choose comfortable outfits that allow movement and trust me to guide gentle prompts. My direction, combined with relaxed family moments, will produce the most authentic images.
-
Artificial lights typically have different colour temperatures, creating mixed-cast shadows that make natural skin tones harder to reproduce. Turning them off simplifies the scene, allowing me to rely on a single, controllable source, daylight, which reduces colour correction and editing time. If it’s cloudy I will use flash to compensate.
-
To include pets, ensure they get exercise before the session to calm them, and let them sniff my bag or shoot area beforehand. Offer favourite toys or treats to encourage natural interaction. Small, familiar rewards will help them relax and be part of authentic family moments.

Conclusion
Preparing your home for an in-home photoshoot is about making space for connection. By decluttering key areas, using natural light, and choosing comfortable outfits, you’ll create an environment that highlights your family’s relationships. Follow these practical tips for a calmer, more enjoyable session and truer, more timeless images.
📸 Check out my FAMILY PORTFOLIO to see more of my work.
💌 Ready to embrace this fun adventure? 📩 Click here to get in touch or 📸 Click here to book your session